Home > Working with Planning Projects > Building an Application > Advanced Project Functions > Data Integration > Create Dynamic Model
Create Dynamic Model
Last Updated 3/9/2012 2:03 AM
Create Dynamic Model allows you to create a cube model from dynamically, based on the data from a ODBC Database source (SQL, Access, Oracle, etc).
To access the Create Dynamic Model, go to : Modelling > Data Integration > Create Dynamic Model
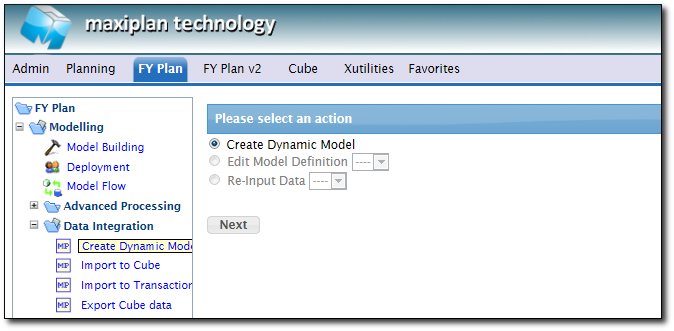
Click Next to start the Dynamic Model Creation Wizard
Connection
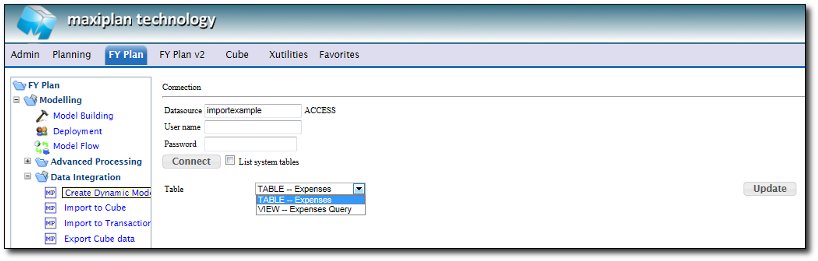
First of all, you will need to define the data source of the ODBC Database, and user name & password (if required).
Click Connect, to display all the available tables & views in the Database.
Select a Table that you want to get the data from, then click Update button
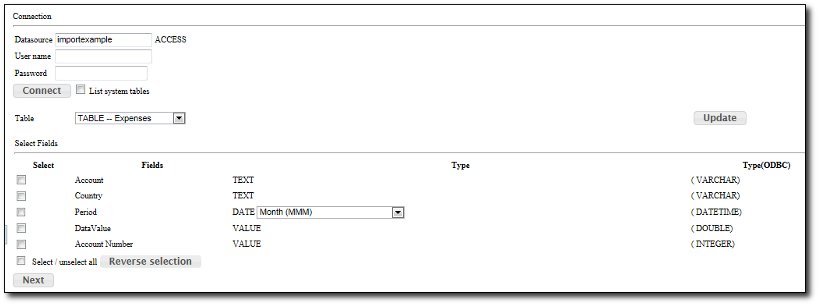
It will display all the available Fields in the selected table/view. Select all the fields that you want to put into the created model.
For example, for now, let's select Account, Country, Period, & DataValue fields.

Click Next to continue
Measure Setup
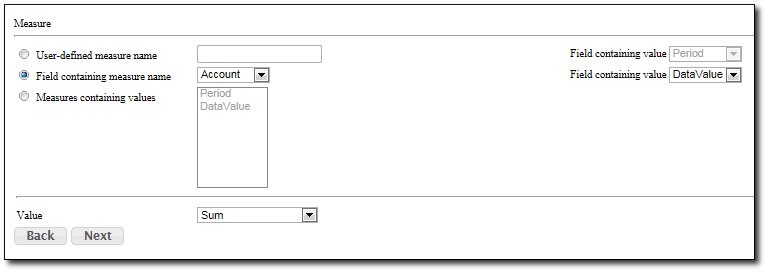
For the Measure name, there are few options that you can choose :
1. Measure names from the user-defined measure name : you can define your own measure name, not coming from the database
2. Measure names from a field that containing measure names : you can select/choose a field that contains the measure name
3. Measure names from a field that containing values : you can select/choose a field that contains values.
For option 1 & 2, you will also need to select a field that contains the value.
After that, define the consolidation of the data in the records, there are few options :
- Sum - a summation of all the value in the records in the database
- Record Count - a count of all the records in the database
- Distinct Count - a count of all the unique records in the database
Click Next to continue
Cube Structure

Period
Next step is to define the Period. You can choose any period set that you're going to apply for the model, it can be Global Period Set or Local period set, you will need to select the Rate as well (if required).
Then choose a field from the database that you want to map the period from.
Version
You can choose whether you will need Version in the model or not, if you want to use Version, then you need to map it to a field in the database.
Click Next to continue
Dimension Hierarchy
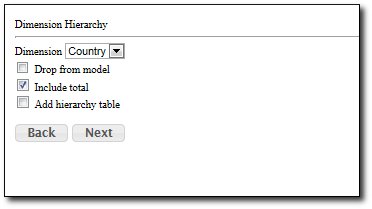
All the remaining Fields not selected in the previos steps are considered as Dimension, which in this example is the Country field.
There are few options for the dimension hierarchy :
- Drop from model - the field will not be inserted in the model
- Include Total - this will include a Total Line for the dimension (single hierarchy)
- Add hierarchy Table - this will add the hierarchy to the dimension. To be able to get the hierarchy table, you must select which table in the database contains the Hierarchy Table
Click Next to continue
Update Mode & Filter
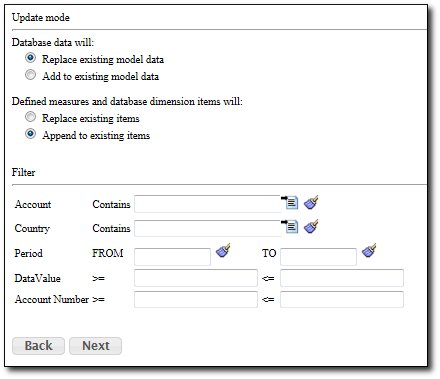
Update Mode
This setting allow you to choose whether you want to replace or append the existing data/dimension structure in the created model when model is refreshed
Database Data :
- Replace existing model data - it will replace all of the existing model data to be similar to the data in the database
- Append existing model data - it will append the data which is not exist in the model
Measure & Dimension item :
- Replace existing item - it will replace all of the existing measure & dimension item to be similar to the data in the database, meaning any manual created measure/dimension will be deleted.
- Append to existing item - it will add/append the measure/dimension item which is not exist in the model
Filter
This filter allow you to filter the data that you want to load into the model,
- For Text type, you can set the filter by filtering a character/word
- For date type, you can set the filter by defining the Range of data you want to load
- For value type, you can set the filter by defining the range of value of data you want to load
Click Next to continue
Model Name & Preview
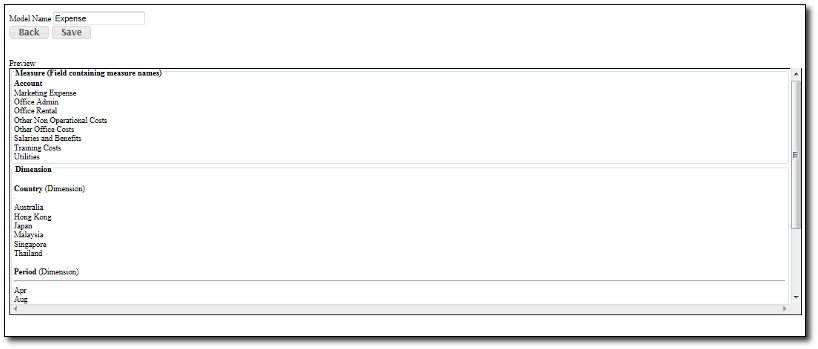
Model Name
Specify the model name that you want to create, please note that the name can not be the same to the existing model.
Preview
Preview of the dimension structure & Measure in the cube model.
Once everything is correct, click on Save button to start creating the cube model & calculating it.
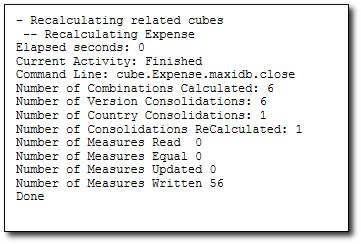
Refresh the project (by clicking the Project Tab), and you will see the new model under Data Models folder
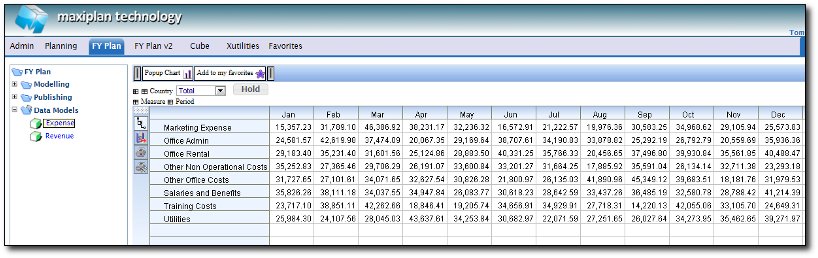
We can add some measures to the model, for example, put Total Office Cost & Total Expenses as below :
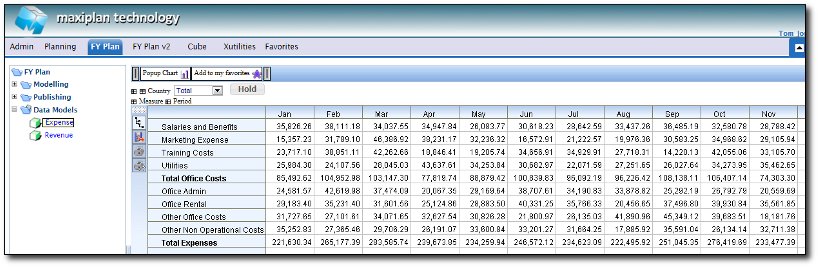
If you choose the Update Mode for the measure & dimension item to be append, then the new measures will not get deleted. However if you choose the Update mode to be Replace, then this new measures will get deleted.
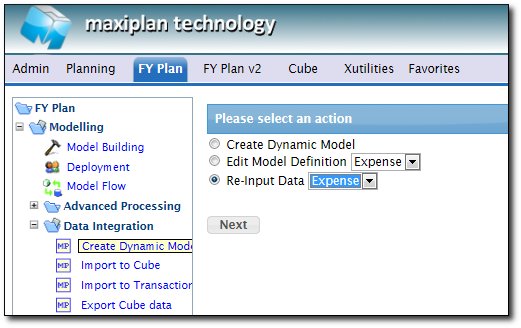
Edit Model Definition
To edit the model settings, go to Modelling > Data Integration > Create Dynamic Model
and choose Edit Model Definition, then select the model name that you want to edit

Update/Refresh Model
To Update the data/dimension structure in the model from the updated database, go to Modelling > Data Integration > Create Dynamic Model
and choose Re-Input Data, then select the model name that you want to update
Click Next to start the update, and it will calculate the cube to show the updated result based on the updated database.
See also
| 

 Page URL: